Step 1-
First of all open your image(s). I'm using these two images for creating this effect.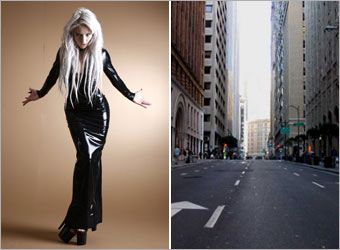
Step 2-
Open City Image and then go to Layer > New Adjustment Layer > Hue/Saturation Adjustment Layer and check on Colorize and apply the following settings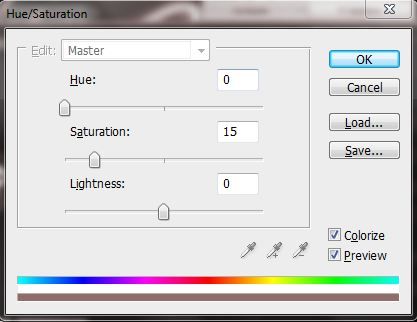
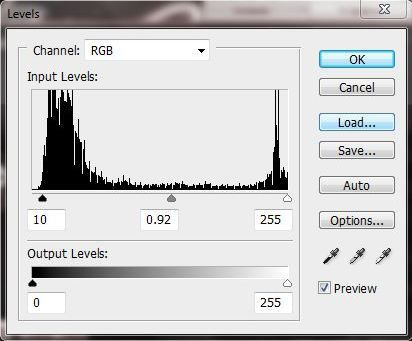
After that go to Layer > New Adjustment Layer > Levels and apply these settings
And your image will look like this

Step 2-
Then create a new layer (shortcut - Ctrl + Shift + N) and set the foreground color to #FFFFFF and background color to #000000 and then go to Filter > Render > Clouds. Set Blend Mode of this layer to Multiply.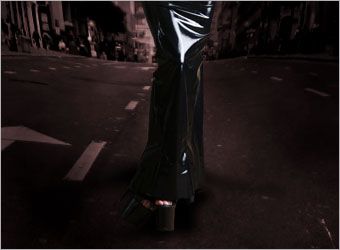
Step 3-
Go to Filter > Liquify. Then select Bloat Tool and apply the following settings :Size - 600px
Density - 50
Pressure - 50
Rate - 80
Turbulent Jilter - 50
And make it like this by clicking once or twice at the center of the city.

Step 4-
Select the person or thing around which you want to show explosion effect and place it at the center of the image like I placed here
Step 5-
Now duplicate this layer and go to Image > Adjustments > Hue/Saturation and set its Lightness to 0. Rearrange this layer and position it under the original layer and then go to Filter > Blur > Gaussian Blur with 3px and rescale to the shape as shown in the diagram.Step 6-
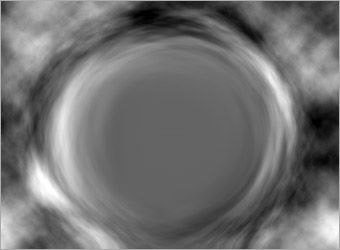
Create a new layer between the object and the city layer.Then use Ellipse tool to draw a circular path. After that go to Edit > Transform Path > Rotate to turn the path at 45 degrees.
Use Direct Selection tool to adjust the path as shown in the diagram.

Then select the layer created and go to Filter > Render > Clouds.
Then go to Filter > Liquify. With the same settings in Step 3, left-click and hold on at the center of the clouds. Release the mouse when you got something similar to this.
Now, go to Path tab to find the path you created earlier in this step. Ctrl+left click on the path to load selection. Come back to Layers tab, select the bloated clouds and set a layer mask with the selection. Then using a Soft Brush Tool with size 300 and color #000000, paint the bottom border of layer mask and get something like this.
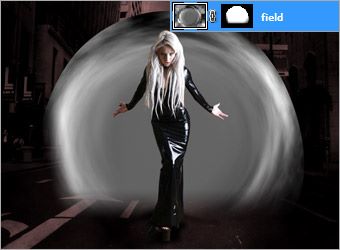
Then set the Blend Mode to Soft Light
Step 7-
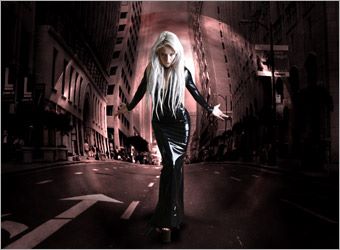
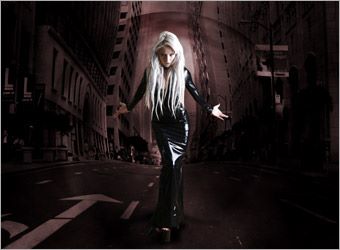
You can highlights by creating a new layer on top of bloated clouds created in previous step and then repeating same procedure as we did in the previous step. Now set the Blend Mode to Color Dodge. Now, go to Image > Adjustments > Auto Levels to enhance the highlights.And its done.
Tweet
wooowwwwww..........
ReplyDeleteThank yu samaira :P
ReplyDelete